
 money
money Five ‘Holy Grail’ recipes for quick and easy family cooking
People often assume, because of my work (and the patriarchy), that I’m the principal cook in my home. It’s true that I am, because I like to do it, and I don’t like to clean, which my husband, Blake, is fine with doing. The division of labour is tidy and true.
But that doesn’t mean he can’t cook. He’s a good cook, in fact, and highly intuitive. He makes food for our kids all the time, even if those kids burst into tears upon seeing their plates because what they really want for dinner is Cheesestrings and a scoop of ice cream (I get it). Blake also came up with one of the dishes below, though all credit goes to Ali Slagle for turning it into a written recipe I can share with you. It satisfies the requirement for easy, creamy, cheesy pasta, and it happens to be delicious for adults, making it the Holy Grail of family cooking: that dish everyone will eat.
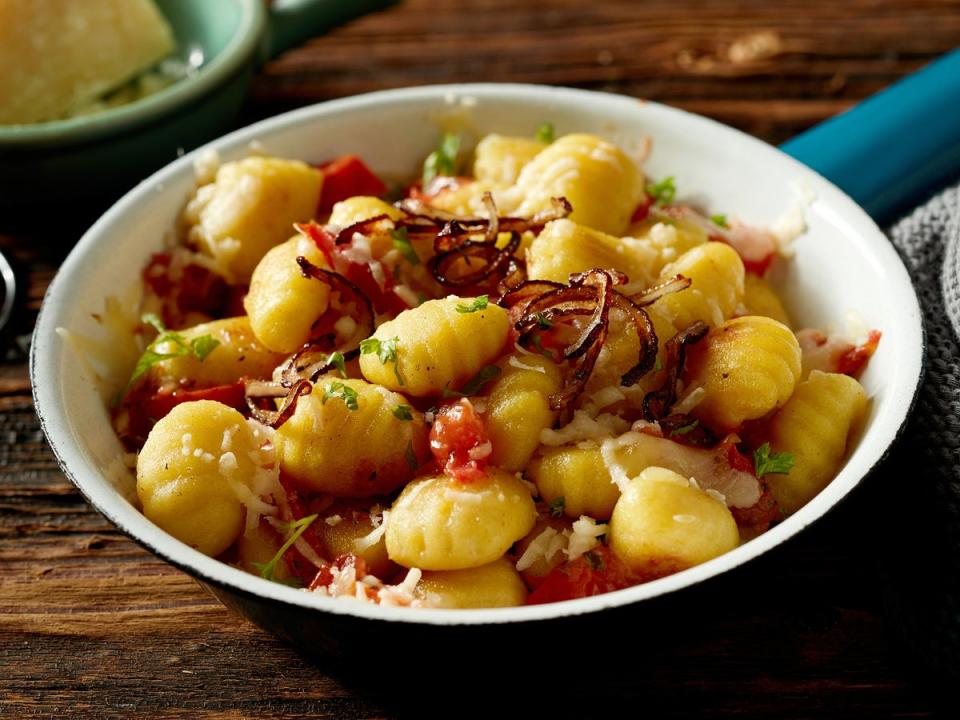
Crispy gnocchi with tomato and red onion
Inspired by panzanella, the beloved Tuscan bread salad, this dish swaps out stale bread for pan-fried gnocchi. The plump, crusty dumplings do a surprisingly good job at soaking up the summery combination of tomatoes, balsamic vinegar and olive oil, while still maintaining their crisp edge. Shelf-stable gnocchi work best, as they are sturdier and crisp up well, but you could use frozen gnocchi, taking extra care not to move them around too much in the pan so they don’t break apart. Top with a sharp cheese such as parmesan, pecorino or ricotta salata for a hit of saltiness, if you like. This meal is best eaten immediately while the gnocchi remains crispy, but it can sit for up to 30 minutes, giving the flavours time to mingle (however, don’t let it sit too long, as the gnocchi will turn mushy).
By: Hetty McKinnon
Total time: 20 minutes
Serves: 4
Ingredients:
5 to 6 tbsp extra-virgin olive oil
1 (500g) package shelf-stable (or frozen) potato gnocchi
680g tomatoes (any variety)
½ red onion, thinly sliced
1 tbsp balsamic vinegar
Salt and black pepper
Handful of chopped parsley, plus more for serving
Handful of torn basil, plus more for serving
Method:
1. Heat a large (about 30cm), well-seasoned cast-iron or nonstick frying pan over medium-high; add 2 tablespoons of olive oil. Add the gnocchi to the pan, breaking up any that are stuck together. Cook for 8 to 10 minutes, tossing every 1½ to 2 minutes so they get golden and crispy all over.
2. Meanwhile, prepare your tomatoes: if you are using small ones like cherry or plum varieties, simply slice them in half. For larger tomatoes, quarter them or slice into bite-size chunks (it is good to have a mix of shapes and sizes). Place the tomatoes and onions in a large serving bowl. Add the balsamic vinegar and 1 teaspoon salt; season with pepper and gently toss.
3. When the gnocchi are golden and crispy, add them to the tomatoes, along with 3 to 4 tablespoons of olive oil and a handful each of parsley and basil. Toss and taste, adding more salt or pepper as needed.
4. Top with more parsley and basil, and eat immediately or at room temperature.
Peach and molasses chicken

The sauce here relies on shop-bought jam as a shortcut to intense fruit flavour, and it is amazing on chicken. This recipe is special enough for a celebration, but it’s so delicious, it can be cooked on a weekly rotation. Almost any fruit jam works, too, if peach isn’t your thing. As for the chicken itself, so much of the fat and flavour comes from the chicken skin that removing that outer layer is tantamount to robbing the meat of most of its taste, so do what it takes to find skin-on pieces. The crispy, charred chicken edges, drenched with the sauce, only happen with skin attached.
By: Nicole Taylor
Total time: About 1 hour
Serves: 6 to 8
Ingredients:
For the peach and molasses sauce:
160g peach jam
70g unsulfured molasses
1 tbsp apple cider vinegar
2 tbsp tomato paste
1 tbsp soy sauce
1 tbsp coriander seeds, crushed
1 tbsp ground mustard
½ tsp salt
For the chicken:
1.3 to 1.8kg bone-in, skin-on chicken thighs
1½ tsp salt
½ tsp freshly ground black pepper
1½ tbsp peanut oil
1 tbsp coriander seeds, crushed
Method:
1. Make the sauce: in a small saucepan, combine the peach jam, molasses, vinegar and ½ cup (120ml) water and bring to a boil over medium-high heat, stirring occasionally to combine. Once boiling, reduce the heat to maintain a vigorous simmer and whisk in the tomato paste, soy sauce, coriander, ground mustard and salt. Simmer for 6 to 8 minutes, stirring occasionally, until thickened; the sauce should be reduced to about 1 cup (240ml). The sauce can be stored in an airtight container in the refrigerator for 3 to 4 days (before using, bring to room temperature and thin with a few teaspoons of hot water if the sauce has become too thick to brush).
2. Prepare the chicken: leaving one section free of coals on a charcoal grill or leaving one burner off on a gas grill, heat a grill to medium (180C). Pat the chicken thighs very dry with paper towels. Season both sides with the salt and pepper. Coat with the peanut oil.
3. Place the chicken thighs on the hot grill, skin-side down, close the grill lid and cook, moving the chicken away from any flare-ups, for 5 to 8 minutes, or until the skin lifts easily from the grill grates. Transfer a few tablespoons of the sauce to a small bowl and set aside. Flip the chicken thighs and use a heat-resistant brush to coat with some of the remaining sauce. Cover the grill again and cook for another 5 to 8 minutes, then flip and baste with the sauce again. Grill with the lid open for another 10 minutes or until the thighs reach an internal temperature of 80C on an instant-read thermometer (if the skin starts to burn, flip the chicken and move to the cool part of the grill). Flip the chicken skin-side up one last time and rest on an upper rack or the cool side of the grill for 10 minutes, using a clean brush and the reserved sauce to baste once more.
4. Transfer the chicken to a platter and sprinkle the tops with the crushed coriander, then serve.
One-pan kimchi fried rice

Kimchi fried rice doesn’t need a weeknight makeover – it’s already so easy. But this oven method maximises the surface area of the dish by using a baking tray, increasing the potential for that coveted nurungji, or scorched rice. By baking this dish, you can start with fresh rice (no need for day-old), as the dry oven heat draws out the moisture from the moist grains and turns them crispy-chewy, plus the only active cooking required here is stirring together the ingredients. The oven handles the rest, which means no actual stir-frying. Eggs cracked on top, gently baked to silky perfection, are a necessary finish, as the runny yolks sauce the gochugaru-stained rice.
By: Eric Kim
Total time: 45 minutes, plus rice cooking time
Serves: 4 to 6
Ingredients:
400g uncooked medium-grain white rice
60ml toasted sesame oil
60ml gochujang
60ml napa cabbage kimchi juice, plus 450g kimchi, coarsely chopped
3 tbsp soy sauce
2 tsp sugar
Salt
1 large onion, cut into medium dice
3 tbsp unsalted butter, cut into small pieces
20g gim (often labelled as roasted seaweed), crushed
6 large eggs
Method:
1. Place the rice in a sieve and rinse it under cold running water, shaking constantly, just a few seconds. Add the rinsed rice and 2 cups (480ml) cold water to a rice cooker or medium pot and soak for 10 minutes. If using a rice cooker, turn it on and cook rice until soft and fluffy. If using a pot, bring the water to a simmer over high heat, then reduce the heat to very low, cover and continue simmering, without peeking, for 20 minutes; remove the pot from the heat and let the rice finish steaming, still covered, until the grains are soft, distended and a little shiny, about 10 minutes. Uncover your cooked rice, fluff with a fork and set aside.
2. Position a rack in the middle of the oven and heat to 220C.
3. In a large bowl, whisk together the sesame oil, gochujang, kimchi juice, soy sauce and sugar. Season generously with salt, then stir in the chopped kimchi and onion. Add the cooked rice, butter and seaweed and stir to combine. Taste and adjust seasoning with salt.
4. Transfer the rice mixture to a large rimmed baking tray and spread out loosely. Bake until the top of the rice is crispy and chewy but not burned, 25 to 30 minutes, opening the oven door halfway through (to check on it, but also to let excess moisture out during the cooking).
5. Remove the pan from the oven. Using a spoon, create 6 shallow depressions in the rice. Crack the eggs into the depressions and place the pan back in the oven until the egg whites have just set, 3 to 6 minutes. Serve immediately, while the eggs are still runny.
Smashed avocado-chicken burgers
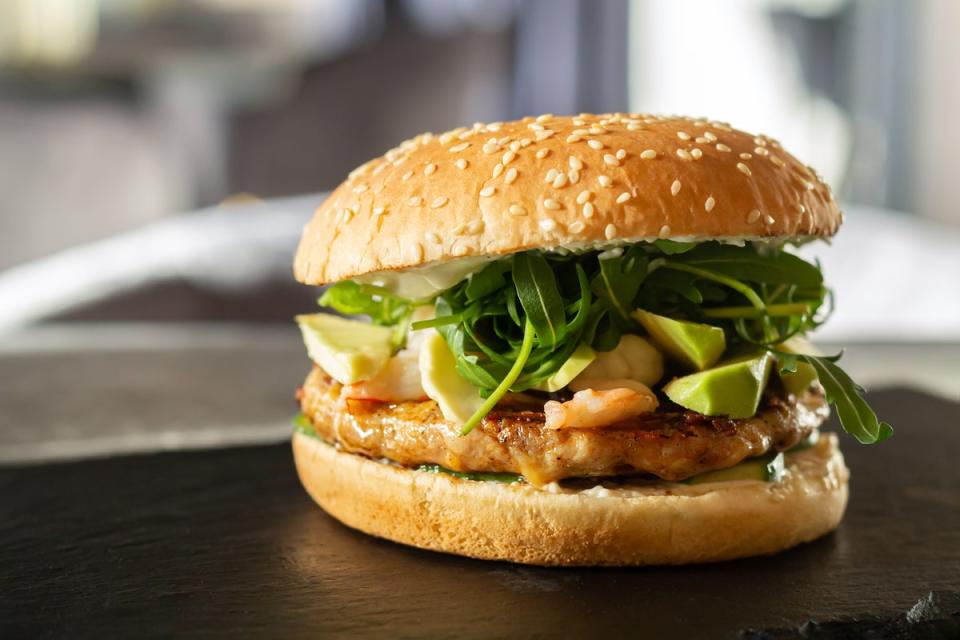
These zippy chicken burgers are loaded with ginger, garlic, coriander and spring onions for fresh flavour and some textural crunch. The secret ingredient is a little mashed avocado that’s added to the chicken mince before cooking, which keeps the burgers tender and light. A citrusy soy mayonnaise is used both inside the patties and slathered on top. (Fish sauce could be used in place of the soy. Decrease the amount and adjust to taste.) Kewpie is a Japanese mayonnaise made with rice wine vinegar and egg yolks rather than distilled vinegar and whole eggs, but you can just as easily use your preferred mayonnaise. Fresh jalapeños offer a satisfying crunch when biting into the burger, though pickled ones could be used for extra acidity.
By: Yasmin Fah
Total time: 25 minutes
Serves: 4
Ingredients:
43g Kewpie or other mayonnaise
1 tsp soy sauce
1 lime, cut into wedges
Salt
20g coriander leaves and tender stems, roughly chopped, plus more for serving
1 ripe Hass avocado, ½ mashed, ½ sliced for serving
2 spring onions, light green and white parts only, thinly sliced
3 large garlic cloves, grated or minced
1 (5cm) piece ginger, grated or minced (about 2 tsp)
¼ to ½ tsp red-pepper flakes, according to taste
450g chicken mince, preferably dark meat
2 tbsp neutral oil, such as canola oil, or ghee
4 brioche or burger buns, lightly toasted
Butter lettuce or other tender lettuce, for serving
1 jalapeño, thinly sliced, for serving (optional)
Method:
1. In a small serving bowl, combine the mayonnaise and soy sauce. Season with the juice of 1 lime wedge and salt as needed.
2. In a medium mixing bowl, use a fork to mash and thoroughly combine the chopped coriander, mashed avocado, spring onions, garlic, ginger, red-pepper flakes, 1 teaspoon salt and 1 tablespoon of the soy-lime mayonnaise. Add the chicken and gently combine. Form into 4 large balls.
3. Heat a large (30cm) cast-iron or heavy frying pan over medium heat until very hot, 1½ to 2 minutes. Add the neutral oil or ghee, then add the chicken meatballs, spacing them out in the pan. Use a metal spatula to press them until they form 1½cm-thick patties. Cook without moving for 3½ to 4 minutes, until a deep golden crust has formed and they easily release from the pan. Flip the patties using the spatula and cook until done with a nice crust on the other side, about 3 minutes more. If the patties need more time, cover the pan and cook for 1 to 2 more minutes, adjusting the heat as needed to avoid scorching.
4. Squeeze a lime wedge over the patties and serve sandwiched between the buns topped with lettuce, a healthy slathering of the lime-mayonnaise, avocado slices, jalapeño slices if using, and coriander sprigs, if desired. Serve with the remaining lime wedges and mayonnaise on the side.
Tip: Resist the urge to add more than ½ mashed avocado to the chicken mince, as the burgers will get too soft and fall apart during cooking.
One-pot pasta with ricotta and lemon (Blake’s pasta)
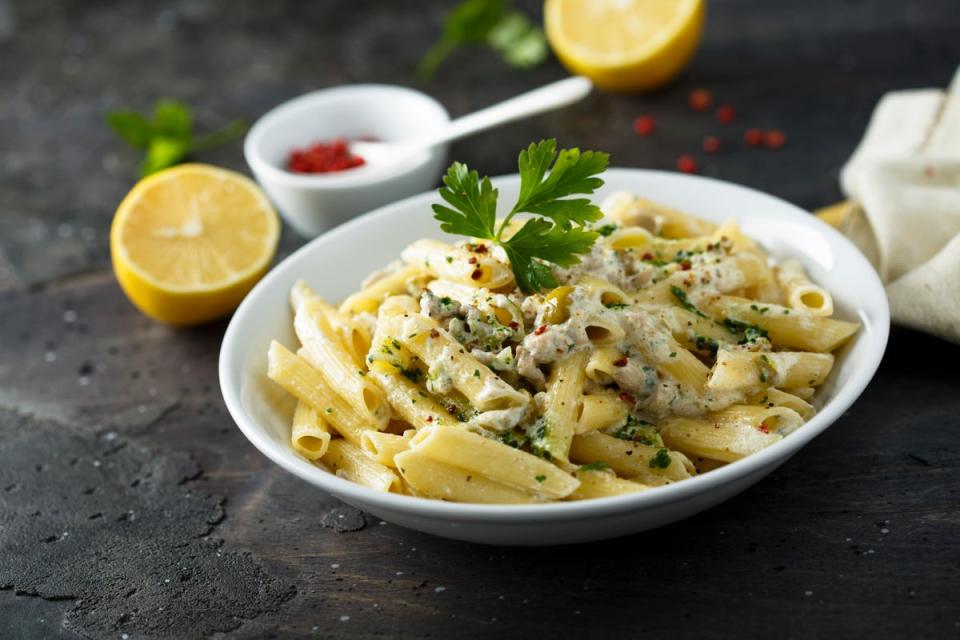
This elegant, bright pasta dish comes together in about the same amount of time it takes to boil noodles and heat up a jar of shop-bought marinara. The no-cook sauce is a 50-50 mix of ricotta and parmesan, with the zest and juice of one lemon thrown in. That’s it. To make it more filling, add peas, asparagus or spinach in the last few minutes of the pasta boiling, or stir in fresh rocket or watercress with the sauce in step 3. It’s a weeknight and for-company keeper any way you stir it.
By: Ali Slagle
Total time: 15 minutes
Serves: 4
Ingredients:
Salt
450g short, ribbed pasta, like gemelli or penne
240ml whole-milk ricotta
128g freshly grated parmesan or pecorino, plus more for serving
1 tbsp freshly grated lemon zest plus 60ml lemon juice (from 1 to 2 lemons)
Black pepper
Red-pepper flakes, for serving
30g thinly sliced or torn basil leaves, for serving (optional)
Method:
1. Bring a large pot of salted water to a boil. Add the pasta and cook according to package instructions until al dente. Reserve 240ml pasta cooking water, then drain the pasta.
2. In the same pot, make the sauce: add the ricotta, parmesan, lemon zest and juice, ½ tsp salt and ½ tsp pepper and stir until well combined.
3. Add 120ml pasta water to the sauce and stir until smooth. Add the pasta and continue to stir vigorously until the noodles are well coated. Add more pasta water as needed for a smooth sauce.
4. Divide the pasta among bowls and top with some of the sauce that’s pooled at the bottom of the pot. Garnish with grated parmesan, black pepper, red-pepper flakes and basil, if using.
© The New York Times
